How to Cook Bone Marrow at Home, Roasted and Served
Soak split beef marrow bones in salted water overnight, pat dry, then roast at 450°F for about 15 minutes until the marrow is soft and pulling away from the bone. Serve with toast, parsley salad and flaky salt.
Roasted Bone Marrow at Home: What It Is and What to Expect
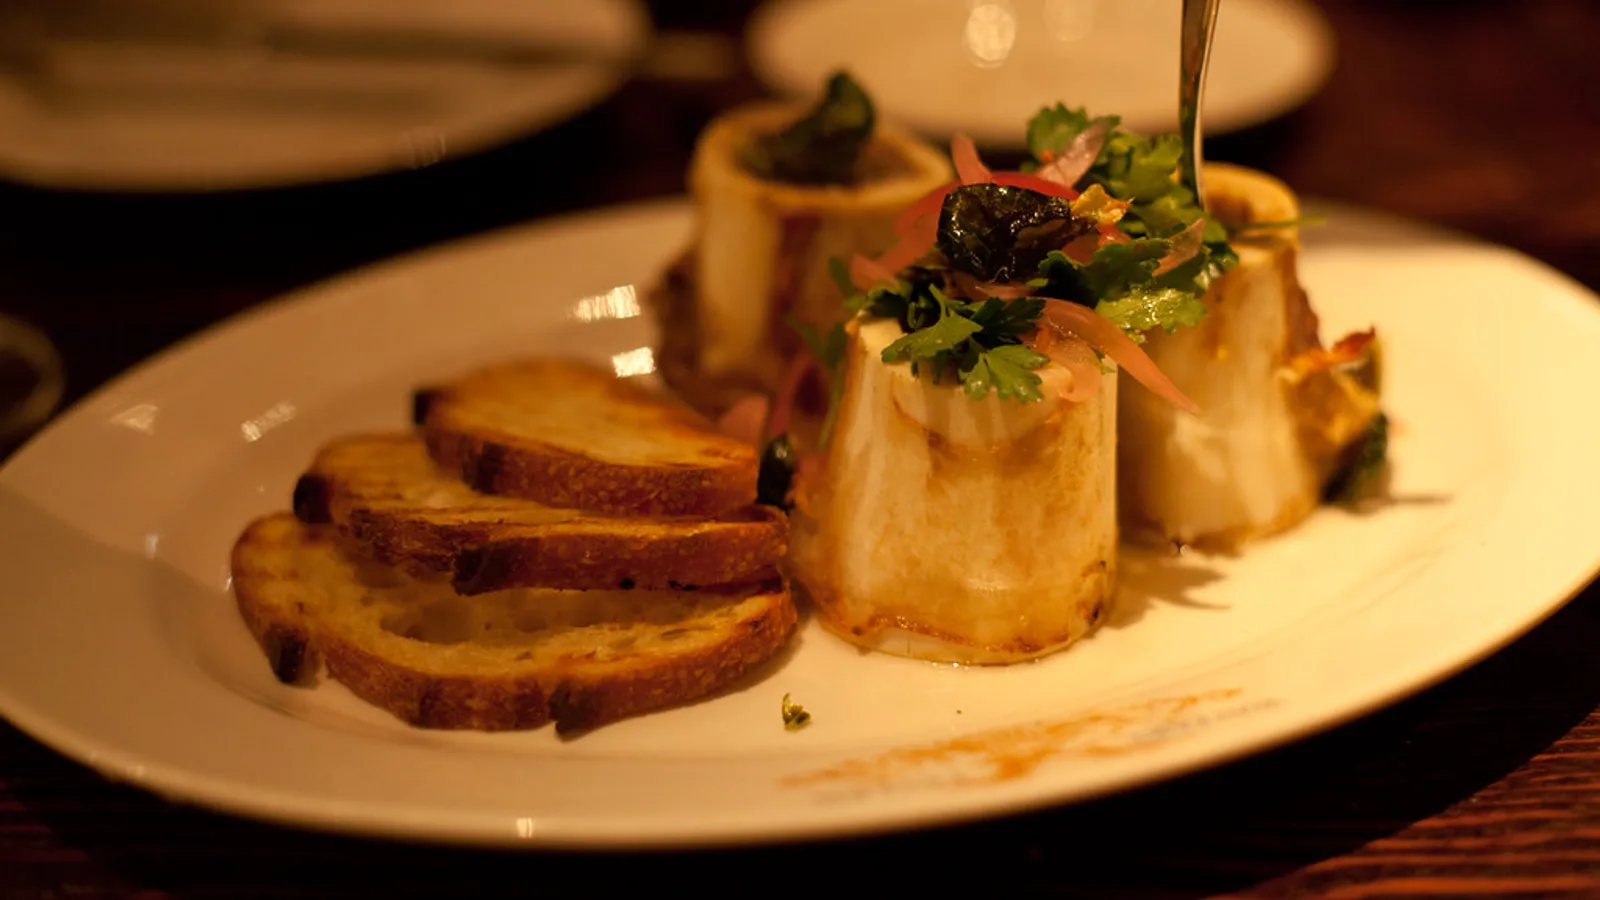
Marrow is the soft, fatty tissue inside beef leg bones, and dry heat turns it into something closer to warm, savory butter than to steak. You scoop it out with a small spoon and spread it on toast. That is the whole dish.
A gas-chromatography analysis of red deer bone marrow published in PMC found that oleic acid, a monounsaturated fat, was the most abundant fatty acid at roughly 37% of total fatty acids, which helps explain marrow’s soft, butter-like melt. That work looked at deer rather than cattle. The texture logic carries over to the beef femur bones your butcher sells.
Plan your timeline around the soak, not the oven. Hands-on work is maybe twenty minutes total, but the bones sit in salted water in the refrigerator the night before. Roasting itself is fast and loud — fat spits, the kitchen smells like a steakhouse, and the window between perfect and collapsed is short.
Richness is the thing most first-timers underestimate. Two halves of a canoe-cut femur per person is a generous starter, and a sharp, acidic side is not decoration — it is what makes a second bite possible.
Checklist: Bones, Gear and Ingredients Before You Start
Gather everything the day before you cook, because the soak has to start the night before service.
Bones
- 4 to 6 beef femur bones, canoe cut (split lengthwise) or cross cut (sawn into 2 to 3 inch rounds)
- Center-cut femur, not knuckle — knuckle bones are for stock, not scooping
Gear
- A nonreactive bowl or container large enough to submerge the bones
- A rimmed, foil-lined baking sheet
- Instant-read thermometer (optional), tongs, a narrow marrow spoon or a demitasse spoon
- Paper towels for drying the bones
Ingredients for the plate
- Coarse salt for the soaking water, flaky finishing salt for the table
- A loaf of sourdough or a baguette, sliced thick
- Flat-leaf parsley, a shallot, capers, a lemon, olive oil, black pepper
Budget before you order. At Triple S Farms, beef marrow bones are priced at $6.25 per pound, with each package holding 6 to 10 bones and weighing about 1.5 to 2 pounds. That is one dinner’s worth for three or four people, which makes marrow one of the cheapest luxuries at the butcher counter.
Step 1 — Choose and Order the Right Bones (Canoe Cut vs. Cross Cut)
Time: 5 minutes to order, ideally two or three days ahead. You need: a butcher who saws bones to order, or a farm that ships frozen.
Ask for beef femur, center cut, and tell the butcher which cut you want. Most counters keep bones frozen and need a day’s notice to saw them cleanly.
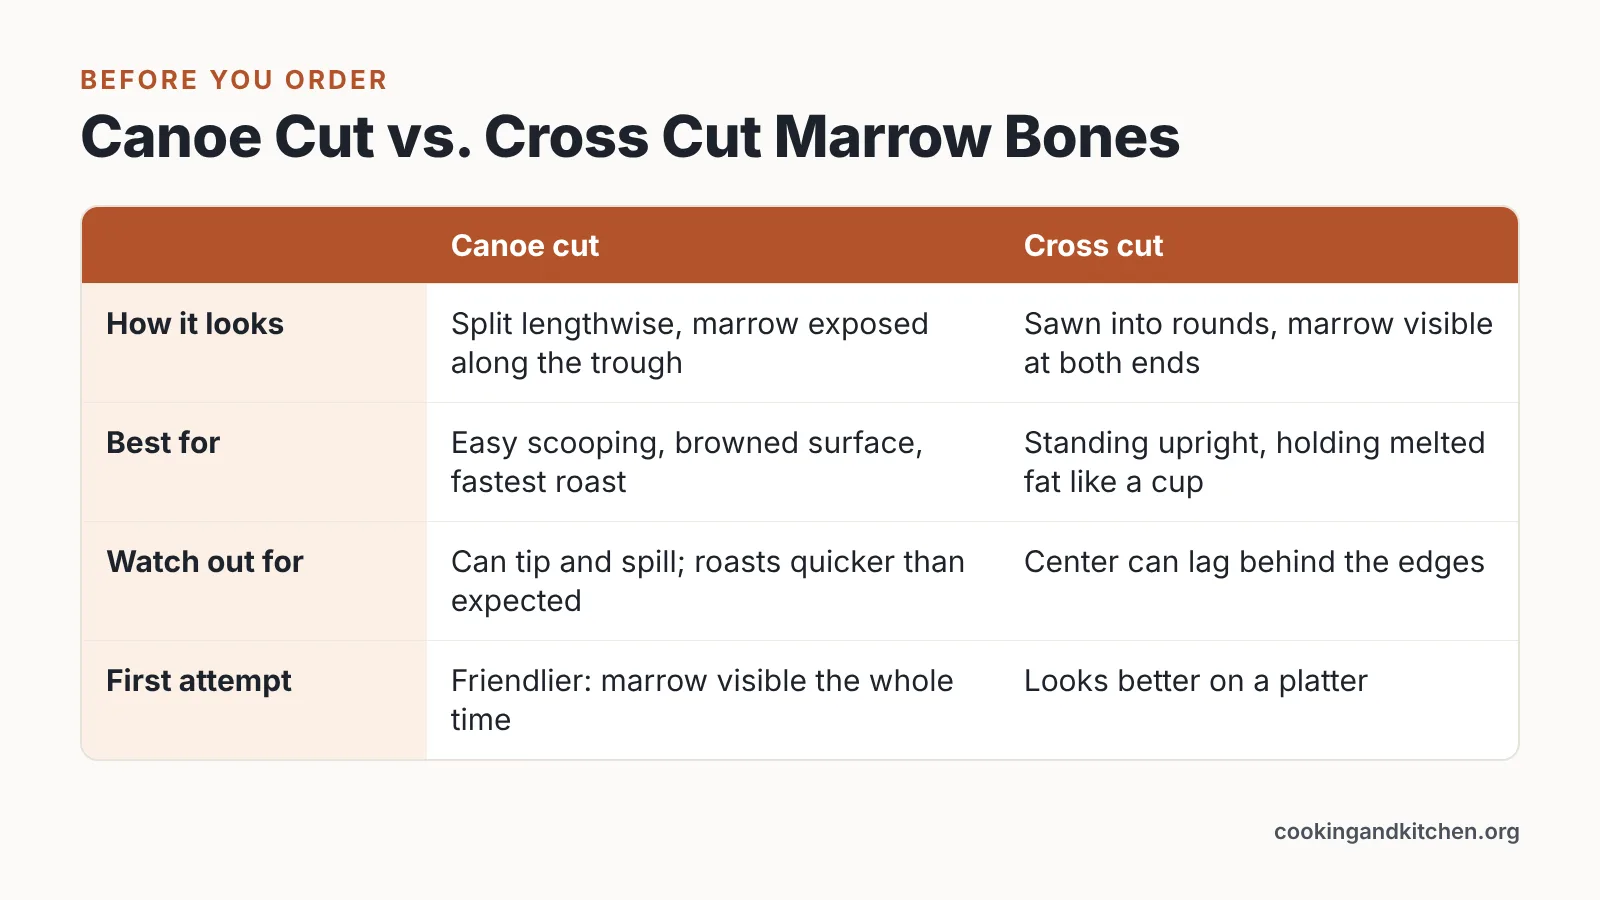
| Cut | How it looks | Best for | Watch out for |
|---|---|---|---|
| Canoe cut | Split lengthwise, marrow exposed along the trough | Easy scooping, browned surface, fastest roast | Marrow can slide out if the bone tips; roasts quicker than you expect |
| Cross cut | Sawn into short rounds, marrow visible at both ends | Standing upright, holding melted fat like a cup | Center can lag behind the edges; harder to scoop from a deep bone |
Canoe cut is the friendlier choice for a first attempt because you can see the marrow the entire time it cooks. Cross cut looks better on a platter and keeps more fat in the bone.
Grass-fed beef marrow and knuckle bones sell at Yonder Way Farm for $6.50 per pound in roughly 3 to 4 pound packages, about $19.50 per package. Order marrow bones specifically if the listing combines them with knuckle bones, since knuckles hold connective tissue rather than scoopable marrow.
Step 2 — Soak the Bones in Salted Water Overnight
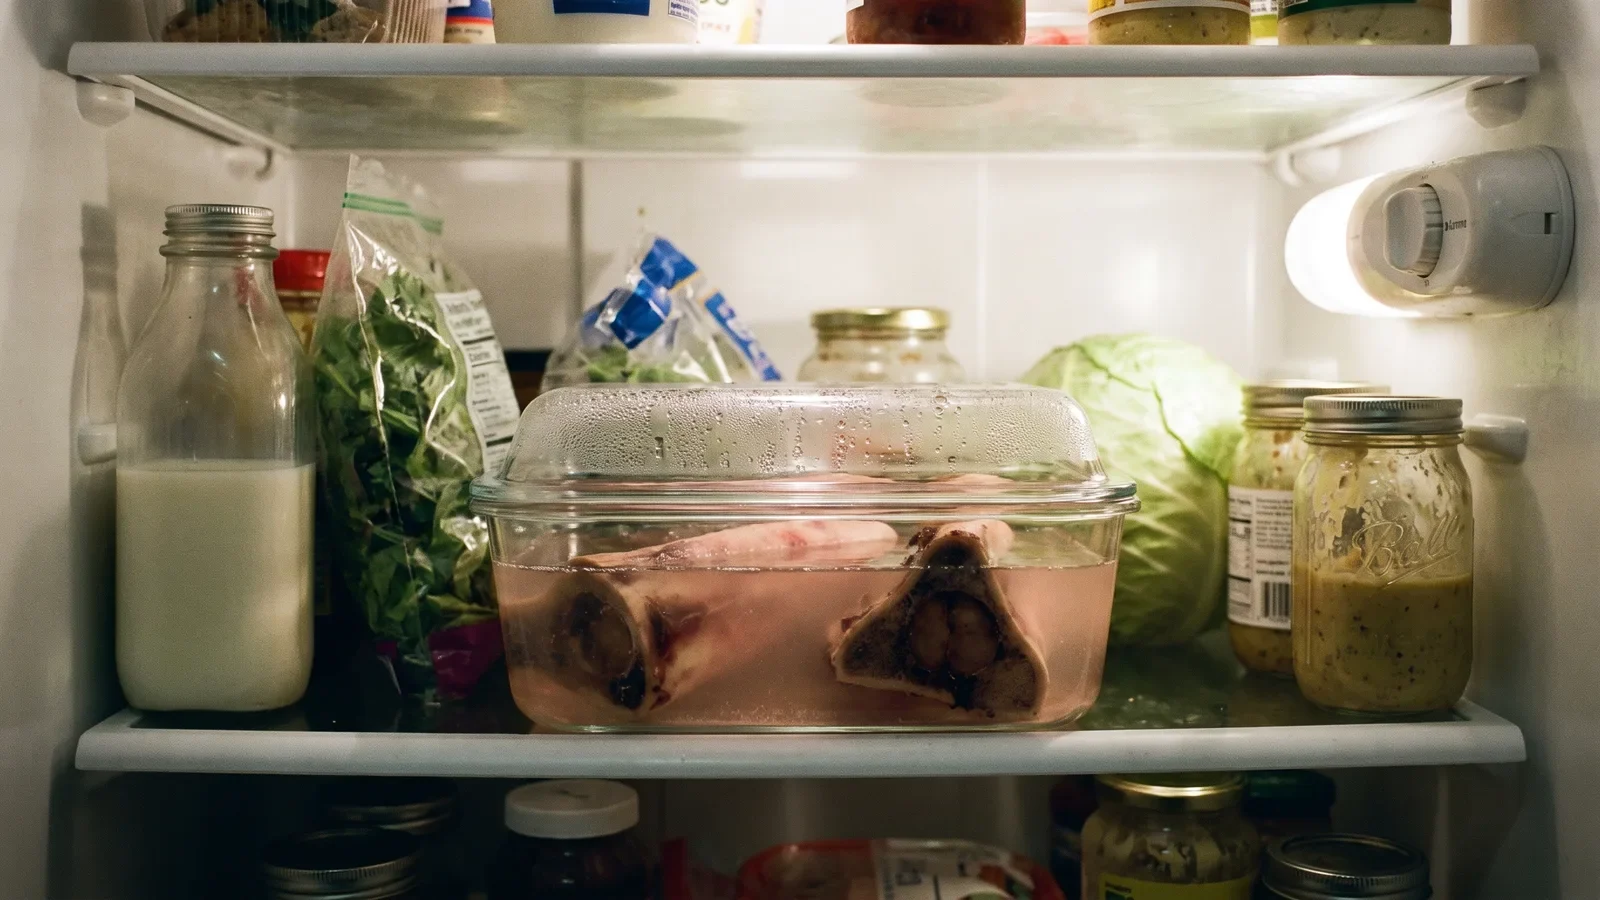
Time: 10 minutes of prep, then 12 to 24 hours in the refrigerator. You need: cold filtered water, coarse salt, a covered container.
Soaking pulls residual blood out of the marrow so it roasts pale and clean instead of gray and mineral-heavy. Skip it and the finished marrow tastes faintly like liver.
Chef and food writer Jennifer McLagan specifies soaking marrow bones in salted water for 12 to 24 hours to draw out blood before roasting. A butcher’s documented soaking ratio at Buy Ranch Direct is 1 tablespoon of salt per 1 cup of cold filtered water. Stanbroke’s Steak School guide instructs cooks to soak split marrow bones in salted water and refrigerate them for 24 hours the day before cooking.
Change the water once or twice if you are going the full day. Each change should come out noticeably lighter in color than the last.
Keep the container cold the entire time. USDA FSIS states that a refrigerator set at 40 °F or below will protect most foods, which is the temperature to hold the bones at during the soak. Counter-temperature soaking is not an option here.
Dry the bones hard with paper towels before they go anywhere near the oven. Surface water steams, and steam is the enemy of a browned top.
Step 3 — Roast Hot and Fast, and Read the Doneness Cues
Time: about 15 minutes, plus oven preheat. You need: a foil-lined rimmed baking sheet and tongs.
Food Network Kitchen’s roasted marrow bones method calls for standing the bones upright on a foil-lined baking sheet and roasting them at 450°F for 15 minutes. Season the exposed marrow with coarse salt and pepper right before the tray goes in.
Stand cross-cut bones on their flat ends. Lay canoe-cut halves marrow-side up and wedge them with crumpled foil so they cannot rock and spill.
The Institute of Culinary Education’s roasted bone marrow recipe gives the doneness cue as marrow that is soft and beginning to separate from the bone, about 15 minutes. Look for three signals together:
- The marrow has puffed slightly and gone glossy, with a few browned spots on top
- A thin line of rendered fat has appeared where marrow meets bone
- A skewer or paring knife slides in with no resistance at the center
Pull the tray the moment the edges pull away. Marrow that has gone liquid and flooded the pan is overcooked, and no amount of resting brings it back.
Step 4 — Serve It: Toast, Parsley Salad, Flaky Salt and Portions
Time: 10 minutes, run during the roast. You need: bread, parsley, shallot, capers, lemon, olive oil, flaky salt.
Toast the bread while the bones roast so both hit the table hot. Thick slices hold up to a heavy spread; thin crackers shatter.
The parsley salad is the counterweight. Slice the shallot paper-thin, soak it in lemon juice for a few minutes to take the bite off, then toss it with picked flat-leaf parsley leaves, a spoonful of drained capers, olive oil and cracked pepper. Dress it at the last second so the leaves stay springy.
Serve straight from the bones on a warm platter. Set out a small spoon per person, a dish of flaky salt and lemon wedges, and let everyone scoop, spread, top with salad and finish with a pinch of salt.
For portions, plan on two canoe halves or three cross-cut rounds per person as a starter, and half that if a steak is following. Pour something sharp — a dry riesling, a young red, or sparkling water with lemon.
Common Mistakes That Ruin Roasted Bone Marrow
The failure that wrecks the most dinners is leaving the bones in too long. Marrow holds its shape, then in roughly two minutes it slumps, renders out and leaves you with hollow bones and a puddle of hot fat on the foil.
Avoid it by setting a timer for ten minutes and checking every two minutes after that, with the oven light on and the door closed. Pull the tray while the marrow still jiggles as a single mass.
Other mistakes worth heading off:
- Skipping the soak. Unsoaked marrow roasts gray and tastes metallic.
- Roasting wet bones. Surface moisture steams the top instead of browning it.
- Using knuckle bones. They yield connective tissue and stock, not spreadable marrow.
- Starting from frozen. Thaw in the refrigerator first, or the outside renders before the center warms.
- Serving without acid. Straight marrow on bread goes cloying by the third bite.
- Letting bones tip over. Crumpled foil collars keep canoe halves level and keep the fat where it belongs.
Storing Leftovers and Saving the Rendered Marrow Fat
Raw bones have a shorter clock than steak. USDA FSIS treats marrow bones as variety meats, which should be cooked or frozen within 2 days, a shorter window than the 3 to 5 days allowed for other beef cuts. Freeze anything you will not roast by then.
Leftover roasted marrow keeps best out of the bone. Scoop it into a small jar while it is still warm, cover, and refrigerate; reheated in the bone it tends to render out completely.
Save the fat on the foil. Tilt the cooled sheet, pour the clear rendered fat through a fine strainer into a jar, and keep it refrigerated — it sets to a soft, spreadable solid. Use it to start a pan of potatoes, to finish a pan sauce, or to fry eggs.
The bones themselves still have work left. Scraped, they go into a stockpot with onion, carrot and a bay leaf for a light beef broth.
Final checklist before you serve
- Bones soaked 12 to 24 hours in salted water, held at 40 °F or below
- Bones patted completely dry and seasoned on the exposed marrow
- Oven fully preheated to 450°F, foil-lined rimmed sheet ready
- Bones standing upright or propped level with crumpled foil
- Timer set, first check at ten minutes
- Pulled when the marrow is soft and starting to separate from the bone
- Toast, parsley salad, flaky salt and small spoons on the table
- Rendered fat strained into a jar, leftovers scooped out of the bones
Frequently asked questions
How long do you roast bone marrow bones and at what temperature?
Food Network Kitchen’s roasted marrow bones method calls for standing the bones upright on a foil-lined baking sheet and roasting them at 450°F for 15 minutes. Start checking at ten minutes, since canoe-cut bones often finish faster than cross-cut rounds.
Do you really have to soak marrow bones before roasting?
Soaking draws out residual blood so the marrow roasts pale and clean instead of gray and metallic. Jennifer McLagan specifies soaking marrow bones in salted water for 12 to 24 hours before roasting, and a documented butcher’s ratio is 1 tablespoon of salt per 1 cup of cold filtered water.
How do you know when roasted bone marrow is done?
The Institute of Culinary Education’s roasted bone marrow recipe gives the doneness cue as marrow that is soft and beginning to separate from the bone, about 15 minutes. Look also for a glossy, slightly puffed surface and a skewer that meets no resistance at the center.
Canoe cut or cross cut — which bones should a beginner buy?
Canoe-cut bones are easier for a first attempt because the marrow stays visible through the whole roast and scoops out with any small spoon. Cross-cut rounds stand upright on their own and hold the melted fat like a cup, but the center can lag behind the edges.
How long do marrow bones keep in the refrigerator?
USDA FSIS treats marrow bones as variety meats, which should be cooked or frozen within 2 days, a shorter window than the 3 to 5 days allowed for other beef cuts. Freeze anything you will not roast within that window, and thaw in the refrigerator rather than on the counter.
Sources
- Roasted Marrow Bones Recipe | Food Network Kitchen
- Recipe: Roasted Bone Marrow — Institute of Culinary Education
- Food Issue: Roasted marrow bones – CBS News
- Simple Roasted Bone Marrow (Restaurant Style) — Buy Ranch Direct
- How to Cook Roasted Bone Marrow at Home — Steak School by Stanbroke
- Keep Food Safe! Food Safety Basics | USDA Food Safety and Inspection Service
- Refrigeration & Food Safety | USDA Food Safety and Inspection Service
- Composition of Fatty Acids in Bone Marrow of Red Deer from Various Ecosystems and Different Categories – PMC
- Beef Marrow Bones — Triple S Farms
- Grass-Fed Beef: Marrow & Knuckle Bones — Yonder Way Farm
AI tools helped write this guide. The Cooking and Kitchen Editorial Team published it after checking every figure against the sources linked above.
Related articles

Cooking and Kitchen Editorial Team
Articles on Cooking and Kitchen are written by the editorial team with AI assistance and checked against the cited sources.


You May Also Like
How to Cook Dried Beans on the Stove or in a Pressure Cooker
How to Cook a Tomahawk Steak with a Reverse Sear