How to Use a Kitchen Scale for Accurate Baking
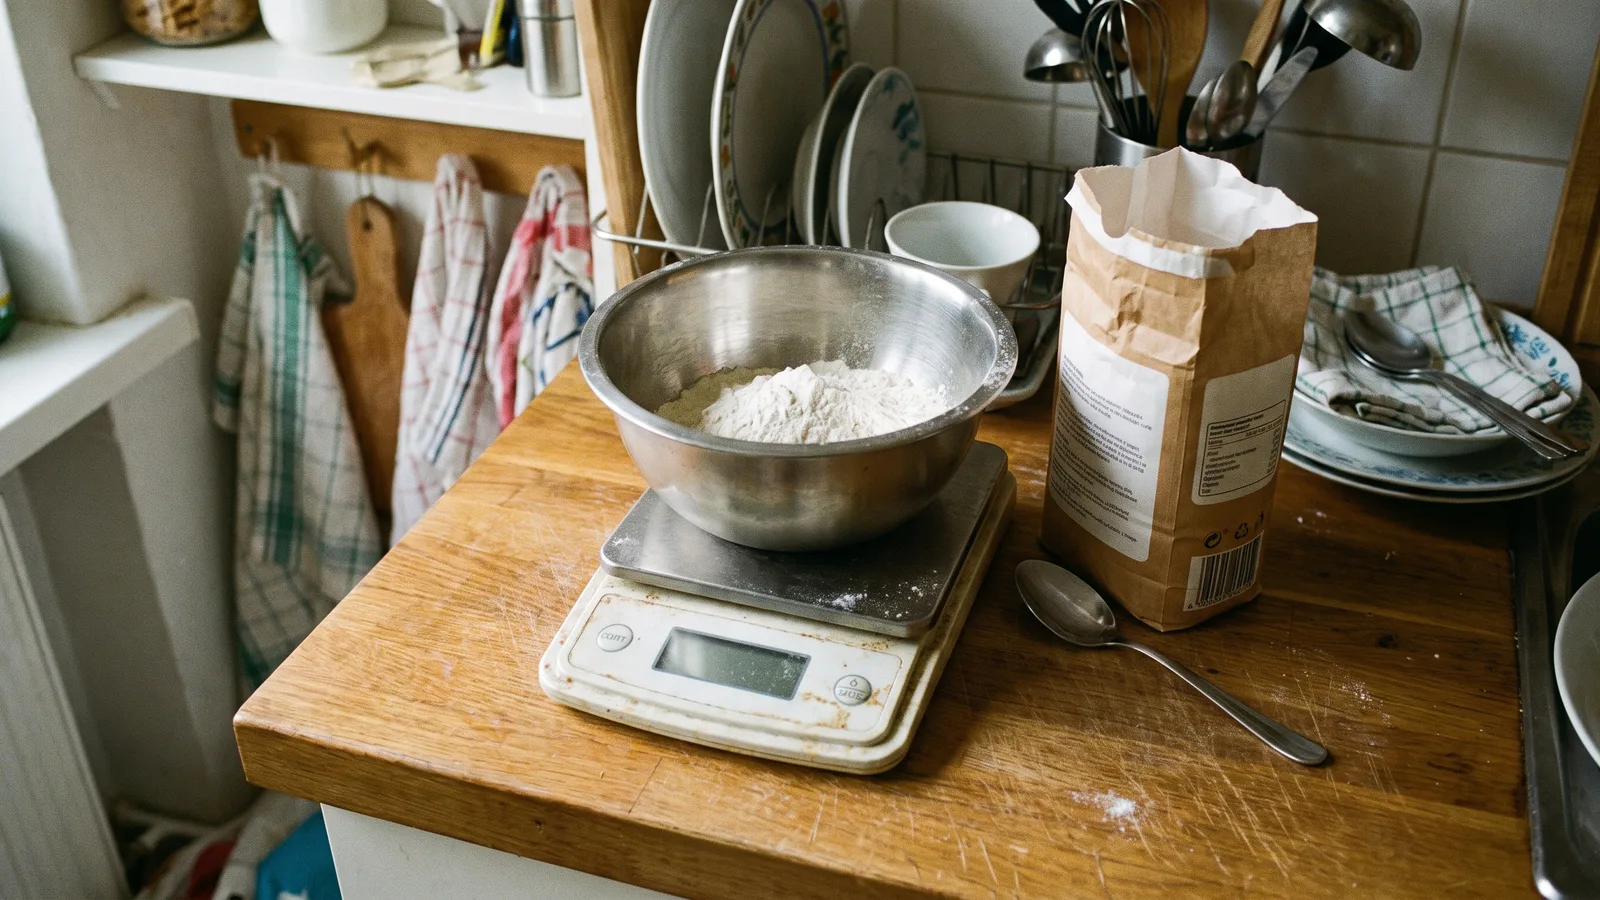
Learning how to use a kitchen scale takes one minute: set it on a hard, level counter, switch to grams, put your empty bowl on top, press tare to return the display to zero, then add each ingredient and tare between additions.
Quick steps
Your scale does its best work before the first ingredient ever hits the bowl.
- Set the scale on a hard, level counter — not a folded towel, not a flexible cutting board.
- Switch the display to grams and wait for it to settle on 0.
- Put your empty mixing bowl on the platform and press tare.
- Add one ingredient, read the number, press tare again.
- Keep going until the last ingredient is in, then mix.
Those five actions replace a drawer of nested cups with one bowl and one button. Budget about two minutes for setup the first time you do it, and a few seconds per ingredient after that. Nothing else in a home kitchen improves bread, cookies, and pancake batter this cheaply.
The sections below unpack each move: what tare is actually doing, how to handle tiny amounts like yeast and salt, how to turn a cups-and-spoons recipe into gram weights, and how to tell whether your scale still reads true. Skip ahead to the accuracy check if your loaves have been behaving oddly lately.

Why a kitchen scale beats measuring cups (and what tare really does)
A cup measures volume, and flour does not hold a fixed volume. Scoop straight from the bag and you compact it; spoon it in loosely and you get noticeably less. Two bakers following the same recipe can end up with doughs that behave nothing alike.
Weight removes that variable completely. Three hundred grams of flour is three hundred grams whether it is packed, sifted, or freshly delivered.
The tare feature works by subtracting the weight of the container already sitting on the platform, so the display returns to zero before you add the ingredient, according to the Escali Primo listing at Office Depot. That is the whole trick, and it is why a scale means fewer dishes rather than more.
| Measuring cups | Kitchen scale | |
|---|---|---|
| What it measures | Volume, which changes with packing | Mass, which does not |
| Dishes used | One per dry ingredient, plus spoons | One bowl |
| Scaling a recipe | Fraction math with thirds and eighths | Multiply the grams |
| Sticky ingredients | Honey clings to the cup | Squeeze straight into the tared bowl |
The habit carries past baking. Portioning oats by weight is the fastest route to oatmeal that comes out creamy instead of gluey, because the oats-to-liquid ratio stops being a guess.
Step 1 — Set up your scale: flat surface, fresh batteries, grams mode
Time: 2 minutes. You need: a hard level counter, fresh batteries, the unit button.
Find a spot with no overhang and no vibration. A scale parked half on a trivet or resting on a silicone mat will read low, and one sitting next to a running stand mixer will jitter between numbers. Clear the area so a dish towel cannot creep under one corner.
Put in fresh batteries before a long bake rather than during one. A fading cell shows up as a reading that slowly climbs or refuses to hold zero, and that looks exactly like a measurement problem.
A typical consumer kitchen scale reads in 1-gram increments, tops out at 5,000 grams (11 pounds), and powers itself down after 180 seconds of inactivity, according to the Etekcity EKS-C193 series user manual. That three-minute timeout matters more than the capacity for most home bakers.
Press the unit button until the display shows g. Ounces in eighths are harder to add in your head, and nearly every modern recipe that lists weights lists grams first.
Step 2 — Zero the empty platform, add your bowl, then press tare
Time: 30 seconds. You need: your mixing bowl, the tare button.
Turn the scale on with nothing on it and let the display reach 0. A number other than zero on an empty platform means something is touching it — a crumb, a cord, the edge of a canister.
Set your empty mixing bowl squarely in the middle of the platform. The display now shows the bowl’s weight, which is useless to you.
Press tare once and wait for 0 to reappear. The Escali Primo, a long-standing test-kitchen benchmark, measures up to 11 pounds in 1-gram (0.1-ounce) increments through a two-button interface in which one button is the tare, per its Office Depot product listing. On most scales that single button is the only control you will touch again.
Choose a bowl big enough for the finished dough, not just the flour. Swapping to a larger bowl halfway through means re-taring and re-reading, and that is where numbers get lost.
Step 3 — Weigh ingredients one at a time, taring between each addition
Time: 5–15 seconds per ingredient. You need: a spoon, and patience with the last few grams.
Add the first ingredient slowly as you approach the target. Pour fast to within about twenty grams, then spoon the rest — overshooting flour is easy to fix, overshooting salt is not.
Press tare, watch the display return to 0, then add the next ingredient into the same bowl. Repeat down the list. Each reading shows only what you are adding right now, which is why the order on your recipe card becomes the order in the bowl.
OXO’s 11-pound food scale resolves to 1 gram in metric mode and 1/8 ounce in US mode, meaning a single gram is the smallest step you can trust in metric. For yeast, baking soda, and fine salt, that resolution is the limit: anything under about 5 grams is more accurate from a measuring spoon than from a 1-gram display.
Keep the same habit for savory cooking. Weighing dry legumes before soaking tells you what yield to expect, which helps whether you are cooking dried beans on the stove or in a pressure cooker.
Step 4 — Convert a cup-based recipe to grams without guessing
Time: 10 minutes for a full recipe. You need: the recipe, a pen, and a published weight chart.
Start with flour, because it is the ingredient that does the most damage when it is off. King Arthur Baking’s official ingredient weight chart sets one cup of all-purpose flour at 120 grams (4 1/4 ounces), the reference weight to use when converting a recipe from cups to a scale. Multiply by the number of cups and write the gram figure in the margin.
Sugar, cocoa, oats, and butter all have their own published weights — do not reuse the flour number for them. Liquids are the easy case: water and milk are close enough to 1 gram per milliliter for home baking.
There is a second method for a recipe you already love. Measure each ingredient exactly the way you normally do, tip it onto the tared bowl, and record what the scale says. You are capturing your own technique, which is the version that has been working.
Write the gram weights directly on the recipe card the first time. You only have to do this once per recipe, forever.
Step 5 — Check your scale’s accuracy and keep readings reliable
Time: 5 minutes, once a month. You need: an unopened package with a printed net weight.
Grab something sealed whose label states a net weight — a bag of sugar, a box of pasta, a can. Tare the empty platform, set the package down, and compare. A reading within a gram or two of the label is fine; packaging adds a little, and label weights are nominal.
Test near the weights you actually use. A scale that is dead-on at 50 grams can still drift at 1,000, so check a heavy item too.
Run two more quick tests. Lift the package off and set it back down three times to see whether the number repeats, then slide it to each corner of the platform to see whether the reading shifts. Wandering numbers point to an unlevel counter or a worn load cell.
Store the scale flat and uncovered, wipe spills before they dry around the buttons, and pull the batteries if it will sit unused for months. Weighing salt as a percentage of meat weight is also how dry-brining stays consistent for a big cut like a tomahawk steak finished with a reverse sear.
Quick checklist: the weighing routine from bowl to bake
Run this list top to bottom the next time you bake. It takes about as long to read as it does to do.
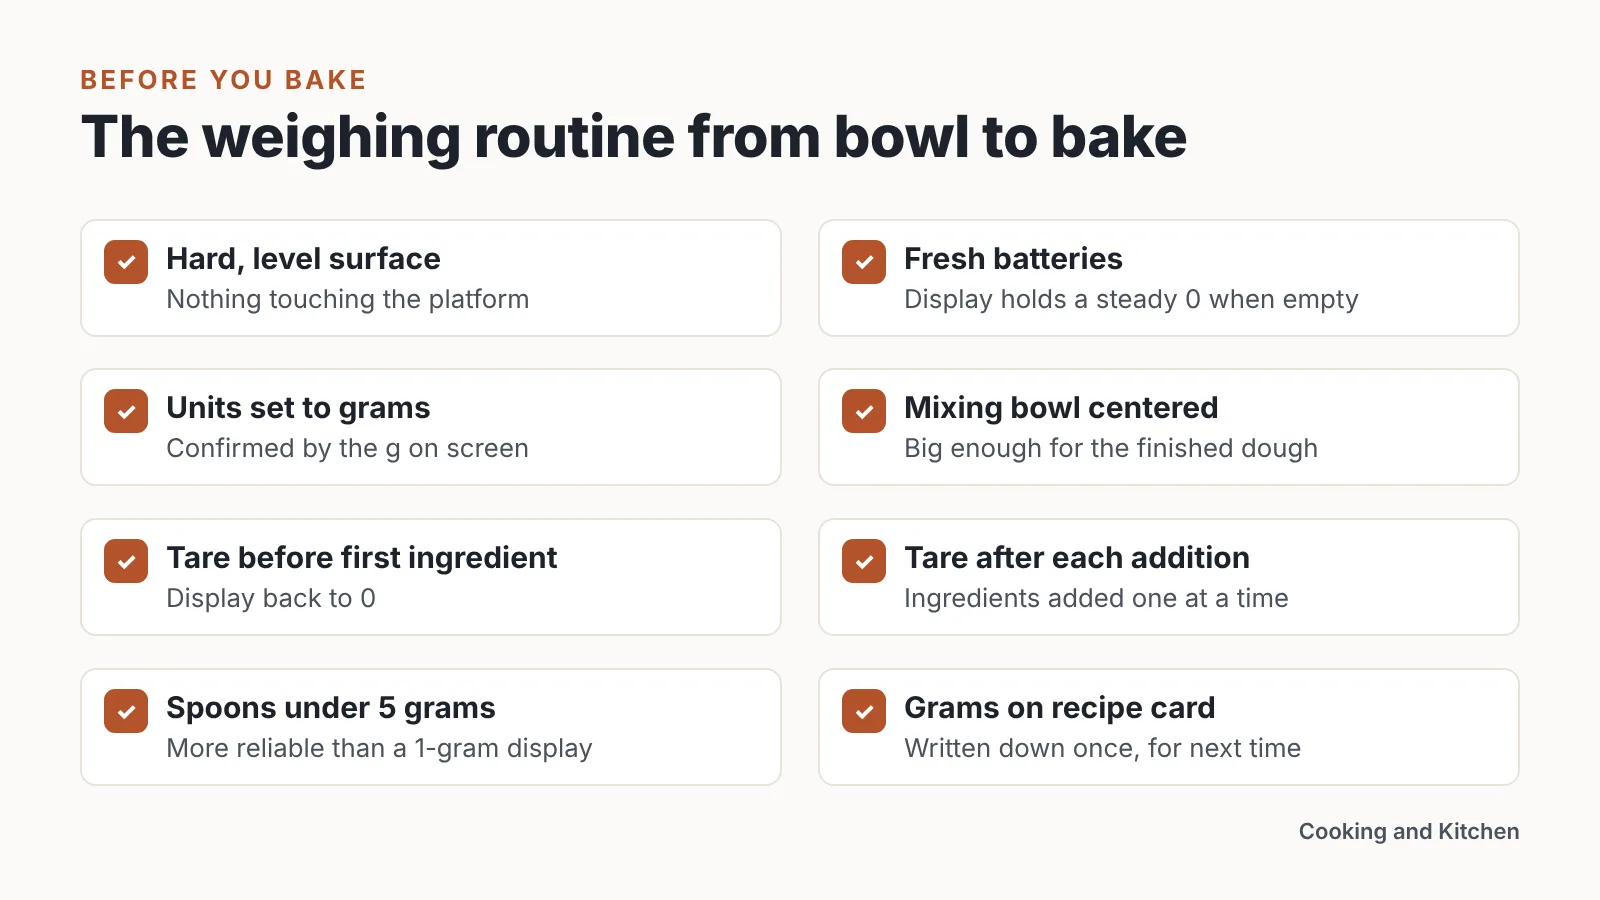
- ☐ Scale on a hard, level surface with nothing touching the platform
- ☐ Batteries fresh; display holds a steady 0 when empty
- ☐ Units set to grams, confirmed by the g on screen
- ☐ Mixing bowl centered on the platform, big enough for the finished dough
- ☐ Tare pressed, display back to 0 before the first ingredient
- ☐ Ingredients added one at a time, tare pressed after each
- ☐ Amounts under about 5 grams measured with spoons instead
- ☐ Gram weights written on the recipe card for next time
- ☐ Scale wiped down and stored flat
Print it or keep it on your phone for the first few bakes. The sequence becomes automatic faster than you expect, and the only part people keep forgetting is the tare between additions.
Common mistakes that ruin weighed measurements
The most common failure is a scale that shuts off mid-recipe. You tare, go answer the door, come back, and the display has gone dark — reactivating it zeroes against the loaded bowl or brings back the gross weight, and the next ingredient lands on a false baseline. Avoid it by keeping one hand moving: stage every ingredient on the counter before you start so nothing takes three minutes.
Overloading is the costliest error. Manufacturers warn that exceeding the 11-pound / 5,000-gram capacity will damage the scale, and the display shows an error indicator instead of a weight, per the Etekcity EK7090 manual. Weigh ingredients into a light bowl, not into a Dutch oven.
Four more that show up constantly:
- Taring with the ingredient already in. Zero the bowl first, then add.
- A bowl that overhangs the platform and rests against the backsplash, which bleeds off weight.
- Mixing units mid-recipe, reading 8 as grams when the scale is still in ounces.
- Weighing hot pans, since rising air and thermal drift unsettle the load cell.
Fix the habit, not the number. A scale that reads consistently is worth more than one that reads precisely once.
Frequently asked questions
What does the tare button actually do?
Tare subtracts the weight of the container already sitting on the platform so the display returns to zero before you add the ingredient, according to the Escali Primo listing at Office Depot. Press it after every addition and each ingredient gets its own clean reading in one bowl.
Should I weigh in grams or ounces?
Grams, in almost every case. OXO’s 11-pound food scale resolves to 1 gram in metric mode but only 1/8 ounce in US mode, so metric gives you finer steps and whole numbers that are easier to add, scale, and halve without fraction math.
How many grams is one cup of flour?
King Arthur Baking’s official ingredient weight chart sets one cup of all-purpose flour at 120 grams, or 4 1/4 ounces. Use that figure when converting a cup-based recipe, and look up separate published weights for sugar, cocoa, oats, and butter rather than reusing the flour number.
Why does my scale turn off in the middle of a recipe?
A typical consumer kitchen scale powers itself down after 180 seconds of inactivity, according to the Etekcity EKS-C193 series user manual. Stage all your ingredients on the counter before you begin so no single pause runs past three minutes and wipes out your tared reading.
Can I weigh a heavy pot on a kitchen scale?
Not safely on a standard model. Manufacturers warn that exceeding the 11-pound / 5,000-gram capacity will damage the scale and that the display shows an error indicator instead of a weight, per the Etekcity EK7090 manual, so weigh into a light bowl instead.
Sources
AI tools helped write this guide. The Cooking and Kitchen Editorial Team published it after checking every figure against the sources linked above.
Related articles

Cooking and Kitchen Editorial Team
Articles on Cooking and Kitchen are written by the editorial team with AI assistance and checked against the cited sources.


You May Also Like
How to Cook Country Style Pork Ribs Tender in the Oven

How to Cook Beef Liver Without a Bitter, Tough Bite