How to Cook Country Style Pork Ribs Tender in the Oven
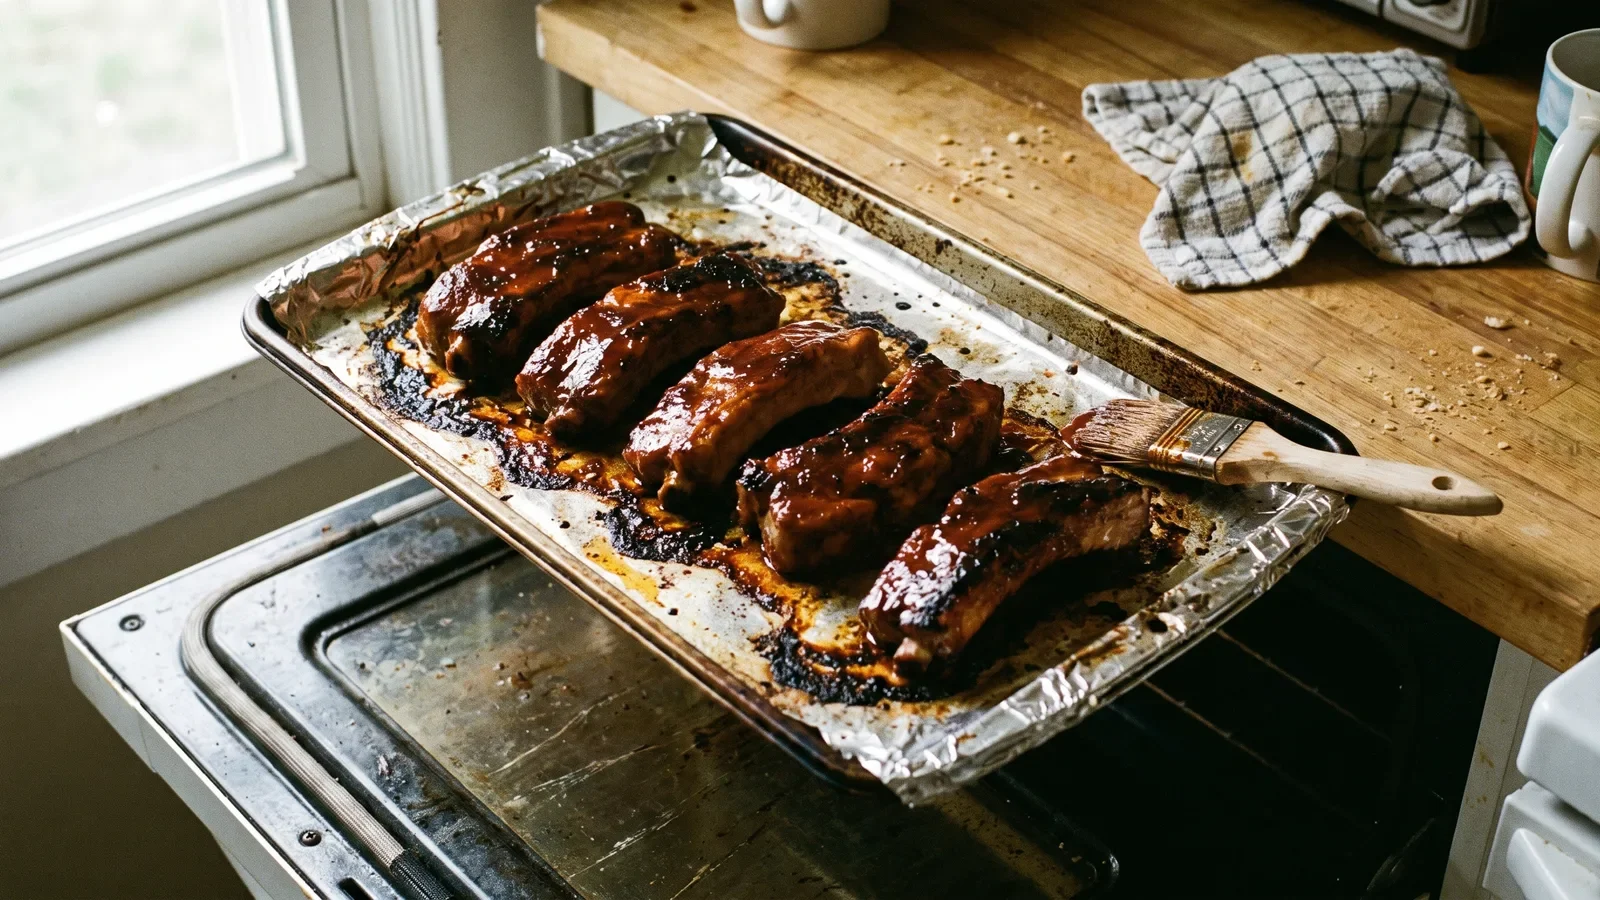
Season thick country-style ribs, set them in a shallow braising liquid, cover the pan tightly, and bake at 325°F until a fork twists easily — then uncover, sauce, and broil a few minutes for a sticky crust.
What Country-Style Ribs Really Are — and Why They Turn Out Tough
The name is misleading. Pull a package from the meat case and you’ll usually find thick, meaty strips with a shoulder blade sliver or no bone at all — nothing like a rack of spareribs. The National Pork Board states that country-style ribs are cut from the point where the pork loin and shoulder meet, which is why they are meatier and fattier than true ribs.
That location explains everything about how they behave in your oven. The loin side is lean and cooks fast. The shoulder side is laced with collagen and intramuscular fat that only soften after a long stretch of moist heat.
Cooks get burned by treating the cut like a pork chop. You sear it hot, pull it at the moment the center loses its pink, and the collagen is still rubber bands. Iowa State University Extension advises that collagen-rich, less-tender cuts are best cooked low and slow with moisture, defining low-temperature cooking as anything at or below 325°F.
Tender country-style ribs are a time problem, not a temperature-ceiling problem. Give the connective tissue enough hours in a humid pan and it converts to gelatin, which coats the muscle fibers and reads as juicy. Rush it and you get dry meat that is also chewy — the worst of both failures.
Checklist: Ingredients, Pan, and Thermometer You Need Before You Start
Gather everything before the oven goes on, because this method has one point of no return: sealing the pan. Opening it to hunt for foil costs you steam and adds time.
Meat and seasoning
- 3 to 4 pounds country-style ribs, cut into roughly even pieces so they finish together
- Kosher salt and coarse black pepper
- A dry rub: brown sugar, smoked paprika, garlic powder, onion powder, dry mustard
- 1 cup of braising liquid — chicken stock, apple cider, lager, or half stock and half cider vinegar
- One sliced onion and a few smashed garlic cloves
- About a cup of barbecue sauce for the finish
Equipment
- A 9×13 metal or ceramic baking dish, or a Dutch oven with a lid
- Heavy-duty aluminum foil (standard foil tears at the pan rim)
- An instant-read digital thermometer
- Tongs, a dinner fork for the tenderness test, and a rimmed sheet pan for broiling
Buy the pork close to cooking day. FoodSafety.gov’s cold storage chart gives fresh pork chops a refrigerator life of 3 to 5 days and a freezer life of 4 to 12 months. USDA FSIS advises taking raw pork home immediately, refrigerating it at 40°F, and using it within 3 to 5 days or freezing it at 0°F.
Skip the wire rack. Country-style ribs want contact with the braising liquid, not air circulation.
Step 1 — Pick Your Ribs (Shoulder-Cut vs. Loin-End) and Trim Them
Time: 10 minutes. You need: the package, a sharp boning or paring knife, paper towels.
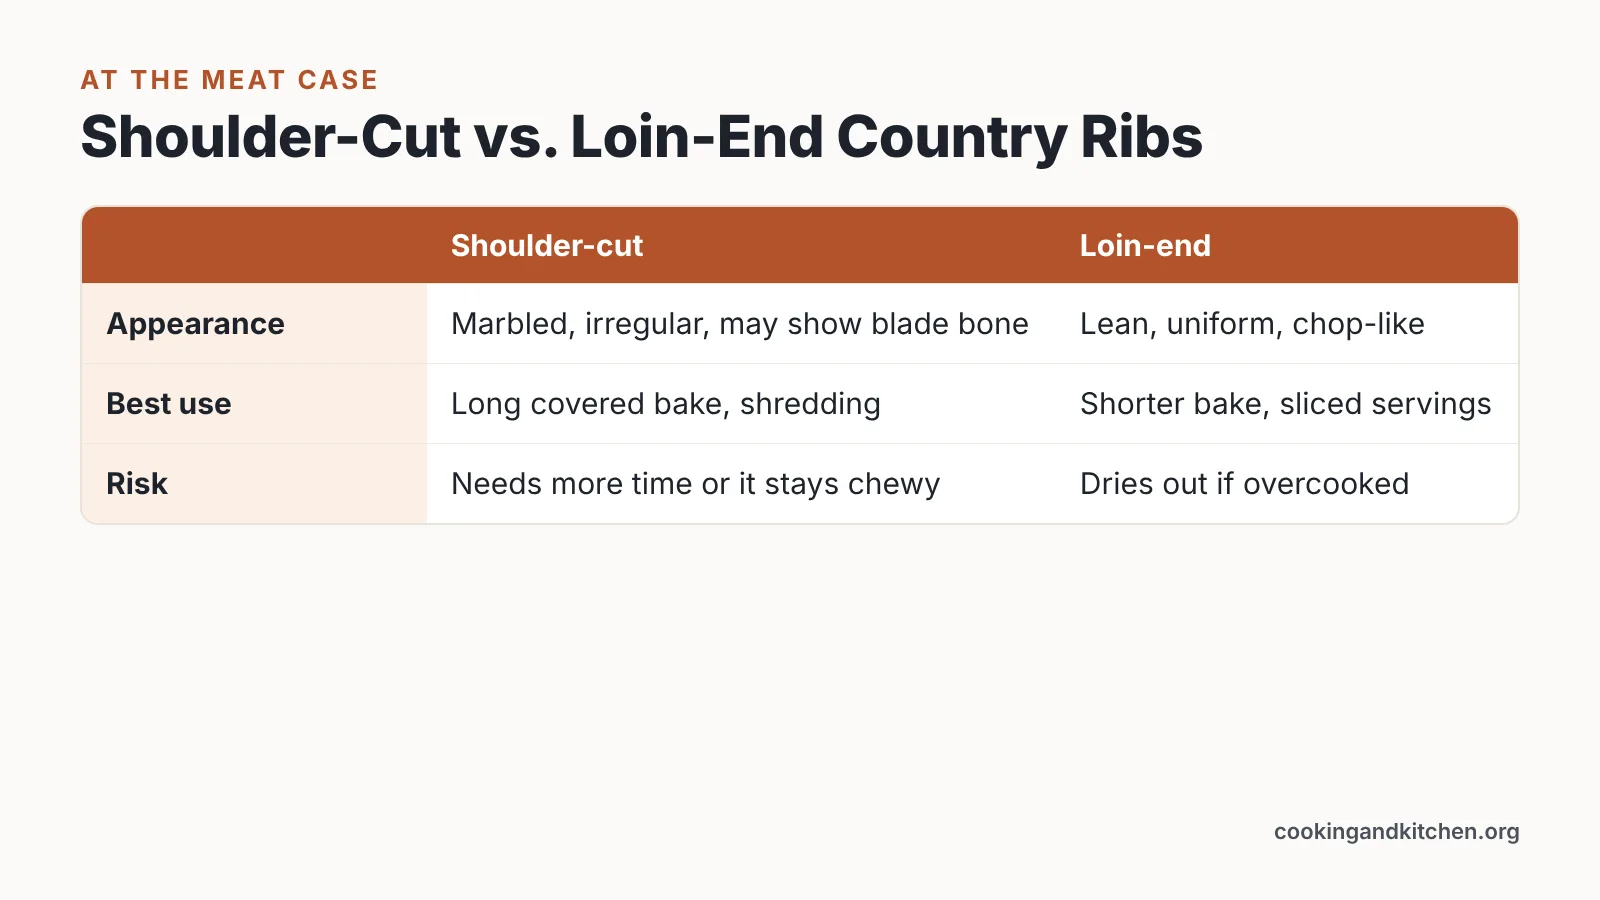
Look at the cut face before you buy. Shoulder-cut pieces show marbling in several directions and often a flat blade bone; loin-end pieces look like a pork chop stretched long, with one solid lean muscle and a fat cap on the edge.
Choose shoulder-cut whenever you have the option. The extra fat and collagen are exactly what this low-and-slow method converts into tenderness, and they forgive an extra half hour in the oven.
| Trait | Shoulder-cut | Loin-end |
|---|---|---|
| Appearance | Marbled, irregular, may show blade bone | Lean, uniform, chop-like |
| Best use | Long covered bake, shredding | Shorter bake, sliced servings |
| Risk | Needs more time or it stays chewy | Dries out if overcooked |
Trim only the thick, hard surface fat — leave the soft intramuscular webbing alone. Pat every piece dry with paper towels so your rub sticks instead of sliding into a paste.
Cut oversized pieces down so the batch is roughly uniform in thickness. A pan holding one two-inch slab next to a thin one guarantees that half your dinner is right and half is wrong.
Step 2 — Season, Rub, and Build a Shallow Braising Liquid
Time: 15 minutes active, plus optional overnight rest. You need: your rub, the baking dish, onion, garlic, liquid.
Salt first, rub second. Salt the pieces on all sides, let them sit while you mix the rub, then press the sugar-spice blend on firmly enough that it sticks when you lift a piece with tongs.
Seasoning the night before helps. Covered in the refrigerator, the salt has time to move into the muscle, and the surface dries slightly for better browning later under the broiler.
Scatter sliced onion and smashed garlic across the pan bottom, then set the ribs on top in a single layer with a little breathing room. Pour the liquid down the side of the dish, not over the meat, so you don’t wash the rub off.
Aim for liquid that comes roughly a third of the way up the pieces — shallow braise, not soup. Too much liquid boils the exterior into a gray, washed-out texture. Too little and the pan runs dry in the second hour and scorches the sugars in your rub.
Acid helps the finished plate. A splash of cider vinegar or a squeeze of lemon in the braising liquid cuts the richness of shoulder fat and keeps the sauce from tasting flat.
Step 3 — Cover Tightly and Bake Low and Slow at 325°F
Time: about 2 to 2½ hours covered. You need: heavy-duty foil, a preheated 325°F oven.
Crimp foil hard around every edge of the dish, or set the Dutch oven lid on and check that it seats flat. The seal is doing the real work here, trapping steam so the top surfaces cook in humid air instead of drying out.
USDA FSIS says the oven should never be set below 325°F when roasting meat such as pork. That rule matters because "low and slow" tempts people toward 250°F, which keeps the meat too long in a range where surface bacteria can multiply before the center catches up.
USDA FSIS recommends a moderately low 325°F oven specifically because it keeps roasted meat tender and limits moisture-loss shrinkage. You get the tenderness benefit and the safety margin from the same dial setting.
Resist peeking for the first ninety minutes. Each lift of the foil dumps the steam you built and adds time back to the clock.
If your oven runs hot on one side, rotate the pan once at the halfway mark and reseal the foil immediately. A cheap oven thermometer on the center rack is worth more than any rub recipe for this step.
Step 4 — Test for Doneness: 145°F Minimum, Fork-Tender Above It
Time: 2 minutes per check. You need: an instant-read thermometer and a dinner fork.
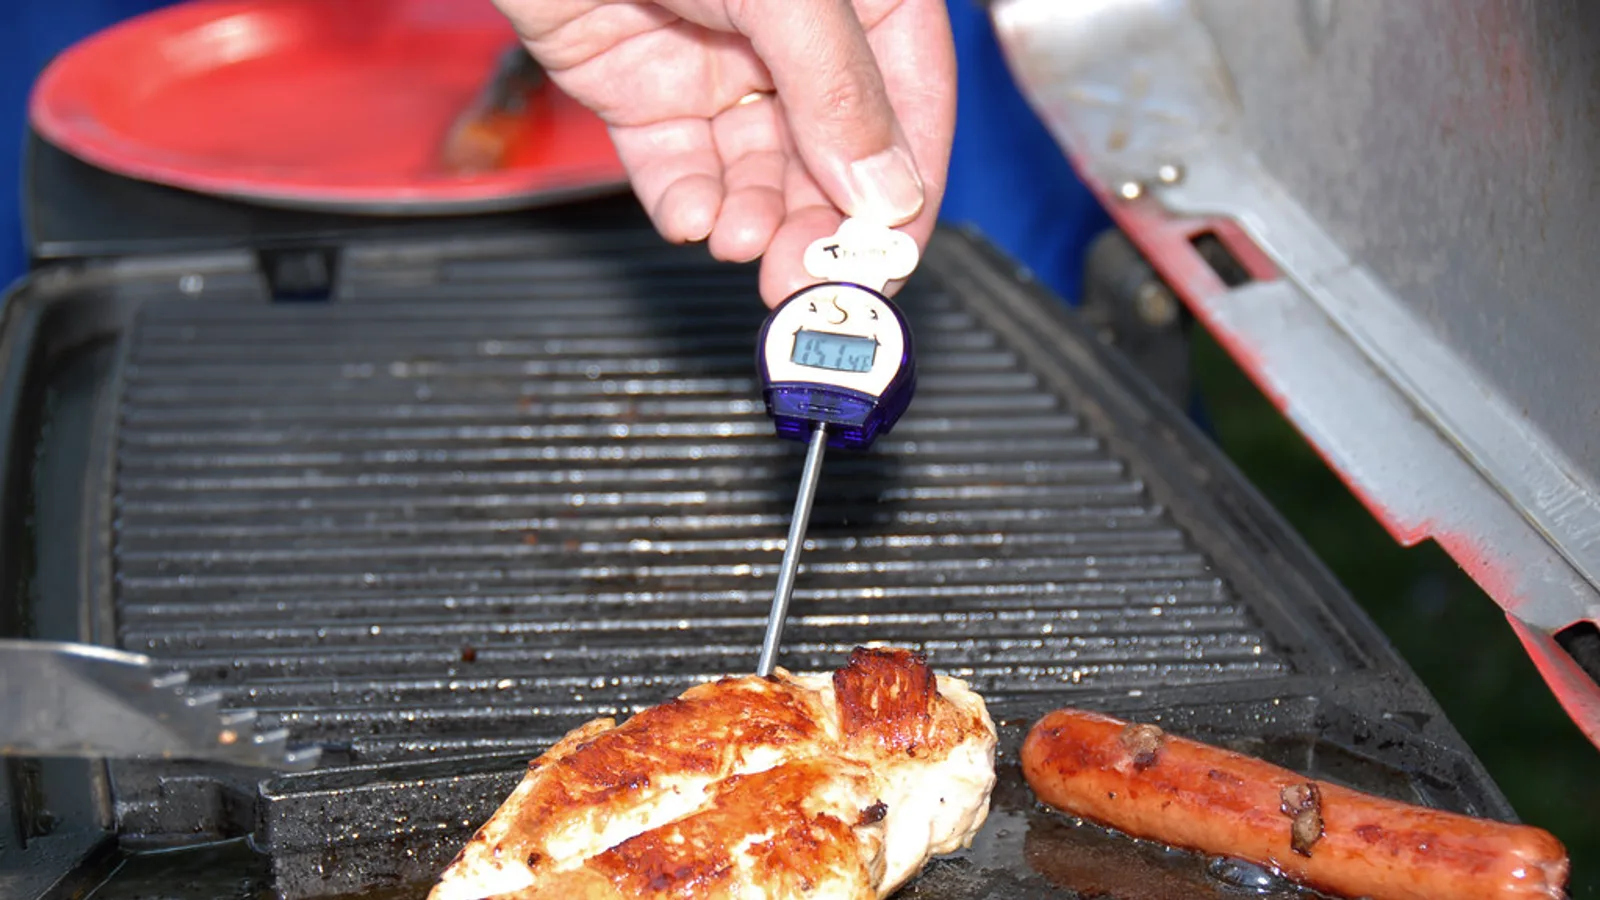
USDA FSIS sets the safe minimum internal temperature for pork chops and roasts at 145°F, followed by at least a 3-minute rest. That number is the safety floor — it is not the tenderness target for a collagen-heavy shoulder cut.
Probe the thickest piece from the side, avoiding bone, and take a second reading in a different spot. Then push a fork into the same piece and twist. Resistance means collagen is still holding the fibers together.
Research summarized by the Pork Information Gateway found that heating pork connective tissue at 158°F for 30 minutes increased conversion of collagen to gelatin. Time at temperature, not just peak temperature, is what loosens the meat.
The targets below are cooking guidance from kitchen practice, not safety rules; the only safety number here is the USDA minimum.
| Internal reading | What the fork tells you | Verdict |
|---|---|---|
| 145°F | Firm, slices cleanly, slight pink | Safe to eat, still chewy |
| 165–175°F | Fork sinks but won’t twist | Keep going, covered |
| 195–205°F | Fork twists freely, strands separate | Pull-apart tender |
If the fork still fights you, reseal the foil and give it another 20 to 30 minutes. Undercooked collagen is a time fix, never a heat fix.
Step 5 — Uncover, Sauce, and Broil for a Sticky Finish, Then Rest
Time: 10 minutes under the broiler, plus rest. You need: tongs, sheet pan, barbecue sauce, a brush.
Lift the ribs out with tongs and move them to a foil-lined sheet pan, leaving the braising liquid behind. Those pan juices are worth saving — skim the fat, simmer them down on the stove, and whisk a few spoonfuls into your barbecue sauce.
Brush sauce on in a thin coat, not a thick blanket. Set the rack about 6 inches under a high broiler and watch constantly, because the sugar in both your rub and the sauce goes from caramel to carbon in under a minute.
Give them one more coat after the first layer sets, then a second short pass. Two thin coats build a lacquered surface; one heavy coat slides off onto the pan.
Rest the meat before serving. USDA FSIS sets the safe minimum internal temperature for pork chops and roasts at 145°F, followed by at least a 3-minute rest, and a longer rest of about ten minutes lets the gelatin-rich juices settle back into the fibers.
Pack leftovers promptly. USDA FSIS warns that cooked pork must be used within 2 hours — or 1 hour if the air temperature is above 90°F — before it is refrigerated at 40°F or below.
Common Mistakes That Make Oven Country-Style Ribs Dry or Chewy
The failure you’ll hit most often is pulling the pan at 145°F because a chart said so. The meat is safe at that point and genuinely unpleasant to chew, since the collagen hasn’t had time to break down. Keep the foil on and keep cooking until a fork twists without effort.
A loose foil seal is the second most common problem. Steam escapes, the top of each piece dries into a crust while the inside is still tough, and the pan liquid evaporates before the collagen gives up. Crimp the foil around the rim, not just over the top.
Cranking the oven to 400°F to save time backfires on this cut. USDA FSIS recommends a moderately low 325°F oven specifically because it keeps roasted meat tender and limits moisture-loss shrinkage, and that shrinkage is what squeezes juice out of shoulder meat.
Saucing too early is the third trap. Barbecue sauce added before the covered bake dilutes into the braising liquid and its sugars sit over a long heat exposure, which dulls the flavor and risks scorching at the pan edges.
Crowding the pan causes uneven results. Pieces stacked on top of each other cook at different rates, and the ones on the bottom poach while the top ones dry. Use a second dish rather than piling.
Final Checklist Before You Serve
Run through this list while the ribs rest, and you’ll catch most problems before they reach the table.
- Pieces trimmed to similar thickness, hard fat removed, surface patted dry
- Rub pressed on, not sprinkled; salted ahead if you had the time
- Braising liquid about a third of the way up the meat, poured down the side of the pan
- Foil crimped tight around every edge, or Dutch oven lid seated flat
- Oven verified at 325°F with a separate thermometer if yours drifts
- Instant-read probe past the safety minimum, with the fork twisting freely
- Sauce applied in two thin coats under the broiler, watched the whole time
- Meat rested before slicing, with pan juices skimmed and reduced for serving
Store what you don’t eat the same day. USDA FSIS advises taking raw pork home immediately, refrigerating it at 40°F, and using it within 3 to 5 days or freezing it at 0°F — treat your cooked leftovers with the same discipline by cooling them fast in a shallow container.
Reheat gently with a splash of the reserved braising liquid, covered, in a moderate oven. Microwaving uncovered drives off the gelatin-rich moisture you spent two hours building.
Frequently asked questions
What temperature should country-style pork ribs be cooked to?
USDA FSIS sets the safe minimum internal temperature for pork chops and roasts at 145°F, followed by at least a 3-minute rest, but country-style ribs from the shoulder only turn fork-tender when you keep cooking them well past that safety floor in a covered pan.
Why are my country-style ribs tough even though they’re fully cooked?
Tough usually means underdone collagen, not undercooked meat. Research summarized by the Pork Information Gateway found that heating pork connective tissue at 158°F for 30 minutes increased conversion of collagen to gelatin, so the fix is more covered time in the oven, not more heat.
Can I cook country-style ribs lower than 325°F to make them more tender?
USDA FSIS says the oven should never be set below 325°F when roasting meat such as pork, so stay at that setting and extend the time instead. Iowa State University Extension defines low-temperature cooking as anything at or below 325°F for collagen-rich cuts.
How long can I keep country-style ribs in the refrigerator before cooking?
FoodSafety.gov’s cold storage chart gives fresh pork chops a refrigerator life of 3 to 5 days and a freezer life of 4 to 12 months, and USDA FSIS advises refrigerating raw pork at 40°F or freezing it at 0°F.
Do I need to sear country-style ribs before baking them?
No sear is required for this method, because the broiler step at the end builds the browned, sticky surface. Searing first adds a pan to wash and can tighten the lean loin-end muscle before the slow covered bake does its work.
Sources
- Safe Minimum Internal Temperature Chart — USDA Food Safety and Inspection Service
- How Temperatures Affect Food — USDA Food Safety and Inspection Service
- Roasting Those "Other" Holiday Meats — USDA Food Safety and Inspection Service
- Cooking Tender, Fall off the Bone Pork Ribs — National Pork Board
- Tender vs Less Tender Cuts of Meat — Iowa State University Extension and Outreach
- Gelatinized High Added-Water Pork Skin Connective Tissue Protein Gels as Potential Water Binders — Pork Information Gateway
- Cold Food Storage Chart — FoodSafety.gov
- Fresh Pork From Farm to Table — USDA Food Safety and Inspection Service
AI tools helped write this guide. The Cooking and Kitchen Editorial Team published it after checking every figure against the sources linked above.
Related articles

Cooking and Kitchen Editorial Team
Articles on Cooking and Kitchen are written by the editorial team with AI assistance and checked against the cited sources.


You May Also Like
How to Cook a Tomahawk Steak with a Reverse Sear
How to Make Oak Kitchen Cabinets Look Modern