How to Make Oak Kitchen Cabinets Look Modern
Learning how to make oak kitchen cabinets look modern comes down to five steps — degrease, fill the grain, prime, topcoat, and swap in bar pulls and soft-close hinges — with the existing boxes left in place.
Quick Steps
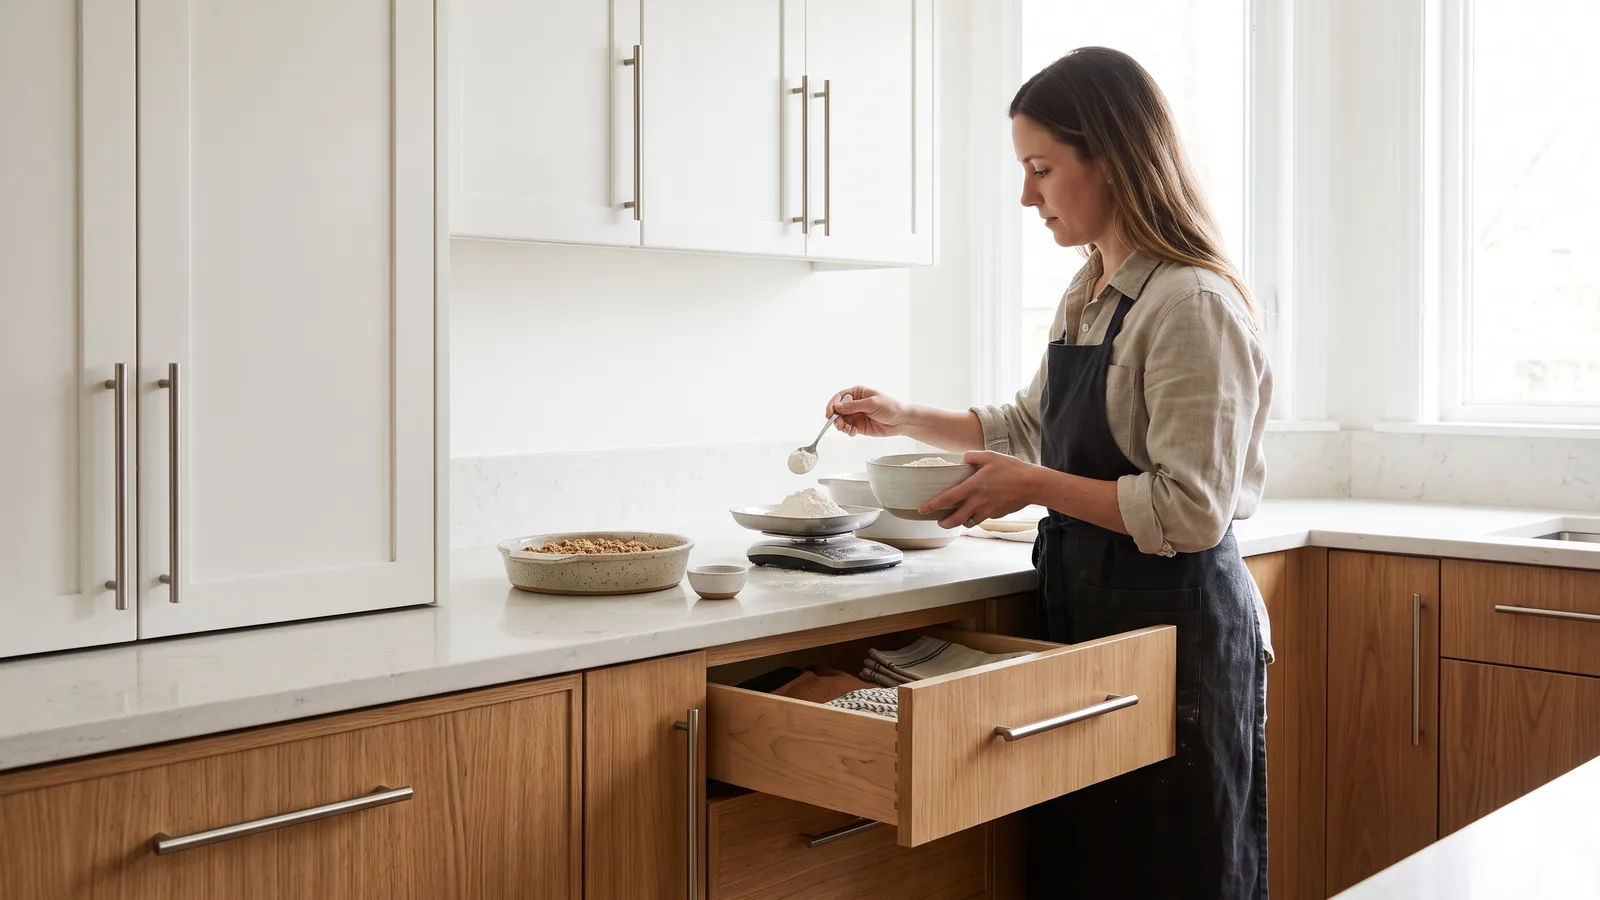
Five moves take an oak kitchen from amber-and-arched to current, and the order matters more than the brand of paint you buy.
- Pick one route — re-stain the grain, paint the fronts, or reface the doors — before you buy a single can.
- Unscrew doors and drawer fronts, labeling each one with painter’s tape tucked inside the hinge cup.
- Degrease every face and edge with a heavy-duty cleaner, rinse, then scuff-sand until the old sheen is gone.
- Fill the open oak pores with clear grain filler, sand flat, then prime and topcoat in thin passes.
- Install bar pulls, soft-close hinges and pullout shelves before anything goes back on the frames.
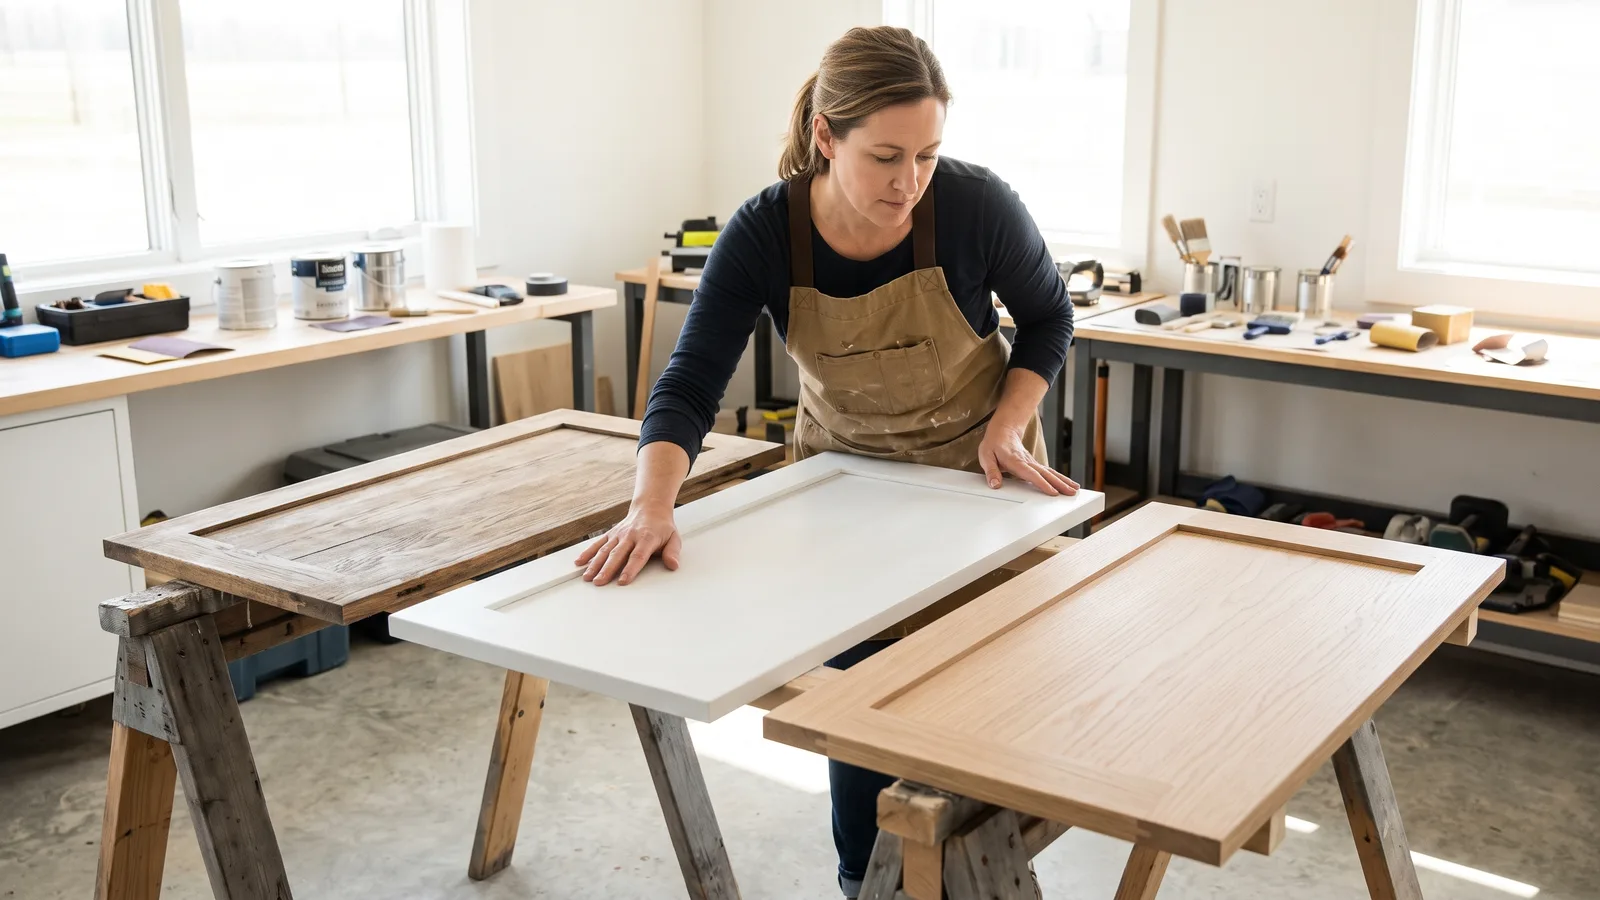
Doors dry flat on sawhorses in a garage or basement; the face frames and boxes get coated in place with a brush and a small foam roller. Plan for the kitchen to be out of normal service for the better part of a week. That is easier if you lean on a single burner and a sheet pan — a pot of dried beans cooked ahead feeds several dinners while the doors cure.
Why Oak Cabinets Read as Dated — and What You Can Change Without Replacing Them
Oak is not the problem. The era attached to it is: honey-orange stain, cathedral-arch raised panels, deep unfilled pores, small brass knobs, and dark interiors with a single fixed shelf. Every one of those is reversible with hand tools and a weekend.
In the 2026 Houzz Kitchen Trends Study, 29% of renovating homeowners chose wood-tone cabinets — up 6 percentage points year over year — pushing white cabinets to second place at 28%. Visible wood grain is in demand again, which means stripping an orange topcoat and re-staining is a legitimate finish line, not a compromise.
What you cannot change this way is layout. Cabinet depth, the position of the sink run, and the height of a soffit all stay put unless you demolish something.
What you can change: color, sheen, door profile, grain texture, hardware, hinge action, lighting under the uppers, and the inside of every box. That list covers almost everything a visitor actually notices from the doorway.
Step 1 — Choose Your Route: Keep the Grain, Paint, or Reface
Time: one evening with samples. You need: a door removed for testing, a small can of stain or paint, a scrap of oak, and good daylight.
Judge the oak first. Press the door faces, check for delamination at the panel edges, and open and close the worst-used door twenty times. Solid frames and flat panels earn a cheap route; warped or swollen fronts do not.
| Route | What happens | Best when |
|---|---|---|
| Keep the grain | Strip, sand, re-stain in a cooler brown or gray-brown, new clear coat | Doors are sound and the grain pattern is even |
| Paint | Degrease, fill pores, prime, two topcoats | Finish is tired or stain color is hopeless |
| Reface | New doors and drawer fronts, veneer over existing boxes | Arched raised panels or damaged fronts |
Houzz research found that 24% of renovating homeowners now use contrasting upper and lower cabinets, with white the leading upper-cabinet color at 40%, followed by off-white at 19% and wood tones at 17%. That is the cheapest hybrid available to you: paint the uppers, re-stain the oak lowers, keep the warmth at eye level where it reads as intentional.
Shaker-style doors were chosen by 61% of homeowners in the Houzz 2025 kitchen study, with flat-panel doors a distant second at 22%, according to The Kitchn’s report on that research. Refacing a raised-panel oak kitchen in Shaker fronts is the single biggest change to the shape of the room.
Step 2 — Remove and Label the Doors, Then Degrease Every Surface
Time: three to four hours for an average kitchen. You need: a drill-driver, painter’s tape, a marker, zip bags, heavy-duty degreaser, sponges, clean water, and nitrile gloves.
Take the doors off from the box side, not the door side, and leave the hinge plates attached to the frames if you plan to reuse them. Write a number on painter’s tape and press it inside the hinge cup where paint will never touch it. Put every screw set in its own labeled bag.
Degreasing is the step people skip and the step that ruins finishes. Cabinets above a range collect airborne cooking oil for decades, and paint will not bond to it. Wash each face twice with a strong cleaner, rinse with clean water, and dry with a lint-free cloth.
Run a fingernail across a dried door. If it squeaks, the grease is gone. If it drags smoothly, wash again.
Scuff-sand next with 150-grit, just enough to dull the gloss everywhere, including the inside edges and the face frames. Vacuum the dust and wipe with a damp cloth before anything else happens.
Step 3 — Fill the Oak Grain and Sand for a Flat, Modern Face
Time: most of one day plus overnight drying. You need: clear water-based grain filler, a flexible plastic spreader or putty knife, 180- and 220-grit paper, a sanding block, and a shop vacuum.
Open pores are the giveaway. Paint sits down into oak’s grain channels and the texture telegraphs through two topcoats, which is why a glossy white oak door can still look like 1994 from across the room.
Water-based clear grain filler dries in roughly 30 to 45 minutes per coat, and two to three coats are typically needed to fill the grain, according to Highland Woodworking’s product information for Aqua Coat. Spread it thin, push it across the grain, then scrape off the excess in the direction of the grain.
Sand flat between coats with 180-grit on a block, never freehand. Finish the final pass at 220-grit and check by raking a work light across the surface at a low angle.
Stop filling when the reflection runs unbroken across the door face. Leaving the lowers unfilled and natural is fine if you are re-staining them — filler only matters where paint will go.
Step 4 — Prime, Topcoat, and Cure Without Rushing the Recoat Windows
Time: two days of coating, then cure time. You need: shellac-base stain-blocking primer, cabinet enamel, a fine-finish foam or microfiber roller, a 2-inch angled brush, and tack cloths.
Oak bleeds tannins. A shellac-base primer locks them down so no pink or tan halos surface through white paint months later.
Rust-Oleum’s technical data sheet for Zinsser B-I-N shellac-base primer states it dries to the touch in 20 minutes and can be recoated in 45 minutes, so the stain-blocking primer coat over oak tannins is a same-day step. Sand the primer lightly with 220-grit, vacuum, tack, and move to enamel.
Two thin topcoats beat one thick one every time. Lay enamel off in long strokes from one end of the door to the other, and resist touching an edge that has started to set.
Dry to the touch is not cured. Cabinet enamel keeps hardening for weeks, so rehang doors gently, keep drawer fronts from slapping shut, and avoid stacking dishes against fresh interiors for the first stretch. Breakfast from a saucepan helps here — a creamy pot of oatmeal needs one burner and no cabinet doors.

Step 5 — Swap Hardware, Hinges, and Interiors for a Finished Look
Time: half a day. You need: a cabinet hardware jig, a drill with a sharp brad-point bit, pulls, soft-close hinges or hinge adapters, and pullout shelf kits sized to your boxes.
Hardware changes the read of a kitchen faster than paint. Bar pulls were used in 75% of homeowners’ kitchen renovations in the Houzz 2025 study, as reported by The Kitchn, which makes them the safe modern replacement for small oak-era knobs.
Brushed nickel was the single most popular hardware finish at 31% of renovations in 2025, leading black hardware by 12 percentage points, according to The Kitchn’s coverage of the Houzz study. Pick one finish and carry it across pulls, faucet and light fixtures.
Use a drilling jig. Two holes drilled by eye on a drawer front will tilt a pull enough to see, and the fix is a filled, repainted front.
Interiors matter as much as fronts on a daily basis. Houzz data shows pullout cabinets were the most popular accessibility-minded kitchen feature, installed by 62% of renovating homeowners in 2025, up from 58% the previous year, and pullout kits drop straight into existing oak boxes.
Your Oak Cabinet Makeover Checklist: Tools, Materials, Budget and Timeline
Tools
- Drill-driver, brad-point bits, hardware drilling jig
- Sanding block, 150/180/220-grit paper, shop vacuum
- 2-inch angled brush, fine-finish foam or microfiber rollers
- Sawhorses or a pair of folding tables, drop cloths, work light
Materials
- Heavy-duty degreaser and lint-free cloths
- Clear water-based grain filler
- Shellac-base stain-blocking primer and cabinet enamel
- Bar pulls, soft-close hinges, pullout shelf kits, felt bumpers
Budget
Professionally refinishing existing cabinets averages $4 to $15 per square foot, or about $1,500 to $4,500 for a whole kitchen, according to HomeGuide. Cabinet refacing — new doors, drawer fronts and veneer over the existing boxes — averaged $4,500 to $13,000 in 2024, according to Kitchen Cabinet Kings, which places it between a DIY repaint and a full replacement.
Timeline
- Weekend one: remove and label doors, degrease, scuff-sand
- Midweek: grain filler coats and sanding on doors in the garage
- Weekend two: prime, sand, two topcoats on doors and frames
- Following week: drill hardware, hang soft-close hinges, install pullouts, rehang doors
Common Mistakes That Make Updated Oak Look Worse
The failure that shows up most often is paint applied over cooking grease. The finish looks fine for a month, then peels in sheets near the range and around the handle zone of the trash cabinet. Avoid it by washing twice with a degreaser, rinsing with clean water, and testing a dried door with a fingernail before you sand.
Skipping grain filler is the second. Paint alone leaves oak’s pores visible, and the texture is exactly what dates the room.
Mixing hardware finishes across one wall reads as unfinished rather than eclectic. Choose one metal and repeat it.
Rehanging doors the same night you topcoat them is a slow-motion mistake. Soft enamel transfers onto the face frame where the door rests, and you will see the mark forever.
One more: painting dark uppers with light lowers in a kitchen with a single small window. Weight at the top makes a modest room feel compressed, and the contrast pattern most renovators use runs the other way.
Frequently asked questions
Can I paint oak cabinets without filling the grain?
Yes, but the open pores stay visible through the paint and that texture is the main thing that dates an oak kitchen. Water-based clear grain filler dries in roughly 30 to 45 minutes per coat with two to three coats typically needed, according to Highland Woodworking’s product information for Aqua Coat, so the extra step costs you a day.
Should I paint my oak cabinets white or keep the wood tone?
Both are current. In the 2026 Houzz Kitchen Trends Study, 29% of renovating homeowners chose wood-tone cabinets, up 6 percentage points year over year, pushing white into second place at 28%. Painting only the uppers and re-staining the oak lowers splits the difference and costs less than doing every door.
What hardware makes oak cabinets look modern?
Long bar pulls in a single finish, installed with a drilling jig so the holes line up. Bar pulls were used in 75% of homeowners’ kitchen renovations in the Houzz 2025 study and brushed nickel led all finishes at 31%, leading black hardware by 12 percentage points, according to The Kitchn’s report.
Is refacing worth it compared with painting?
Refacing changes the door shape, which painting cannot do — relevant if your oak has cathedral-arch raised panels. Cabinet refacing averaged $4,500 to $13,000 in 2024 according to Kitchen Cabinet Kings, while professional refinishing averages $4 to $15 per square foot, or about $1,500 to $4,500 per kitchen, according to HomeGuide.
How long before I can use the cabinets normally again?
Primer moves fast — Rust-Oleum’s technical data sheet for Zinsser B-I-N states it dries to the touch in 20 minutes and recoats in 45 minutes — but cabinet enamel keeps hardening for weeks. Rehang doors gently, add felt bumpers, and avoid stacking heavy dishes against fresh interiors at first.
Sources
- 10 Kitchen Remodeling Trends to Know for 2026 — Houzz
- These Are the Kitchen Features Homeowners Are Choosing Right Now — Houzz
- 10 Kitchen Remodeling Trends to Know About in 2025 — Houzz
- 3 Cabinet Trends Dominating Kitchen Renovations in 2025 — The Kitchn
- Technical Data BIN-03 Zinsser B-I-N Shellac Base Primer — Rust-Oleum
- Aqua Coat Clear Grain Filler — Highland Woodworking
- How Much Does It Cost to Refinish Cabinets? — HomeGuide
- Cabinet Refacing Cost: Is It Cheaper To Replace or Reface? [2024 Data] — Kitchen Cabinet Kings
AI tools helped write this guide. The Cooking and Kitchen Editorial Team published it after checking every figure against the sources linked above.
Related articles

Cooking and Kitchen Editorial Team
Articles on Cooking and Kitchen are written by the editorial team with AI assistance and checked against the cited sources.


You May Also Like
How to Cook Frozen Broccoli Without the Mush
How to Cook Oyster Mushrooms So They Crisp, Not Steam